The new email editor in Optimizely Campaign - 10 tips to get started!

-
Select the right node
As usual, open your campaign overview and create a new Smart Campaign or transactional email. Now drag the new "Email (Beta Editor)" message node into the campaign and click on "Edit content". The new editor will open.

Image source: Optimizely As usual, only one message type can be used within a campaign. It is not possible to use the old and new editor in parallel within a campaign. In this case (e.g. for an A/B test), simply create separate campaigns.
-
Make the right settings
The first step is to make important basic settings for each mailing. In the "Properties" menu, you define the mailing width, the background color and your default font. You can also assign a title and language to improve accessibility.
When selecting the mailing width, you should bear in mind that the new editor is based on a common grid system, which allows you to divide your newsletter content into up to 6 columns. The number and width of these columns can be easily adjusted in each section. The width of the columns is based on the selected ratio and the defined content width. For a 600px wide newsletter, the columns are between 100px and 600px wide, depending on the number of columns.
-
Sender, subject & preview text in one place
The menu for defining the sender name, address and subject lines can now be found at the top right of the editor under "Sender & subject". A new addition is the input field for the preview text. You can assign this together with the subject line and also target it to specific groups. With the help of placeholders, these important elements can also be personalized with two clicks.
-
Outline paragraphs become rows
In the old editor, you were used to organizing meaningful sections of your newsletter in so-called outline paragraphs. In the new editor, we take up this concept with "rows" and expand the possibilities.

Image source: Optimizely In the "Layout" menu, select an empty row layout and drag & drop it into the mailing. If you have already added and saved your own rows with content, these can be found in the "Saved rows" selection (more on this under point 7) and can also be dragged into the mailing.
You can customize the design of your empty series in the "Series properties" menu. Here you can define the background of the section, specify the number and width of columns and make settings for the alignment in the desktop and mobile versions. The inner spacing of the columns can be easily defined individually for all pages here. Border lines and corner rounding can also be selected.
A row can contain a variety of content elements (title, text, button, etc.). These can now also be moved and copied across rows.
-
Maintain & optimize content
A wide range of content elements are available for your mailing content, which can be dragged and dropped into any row and column. The width of the content automatically adjusts to the available space. Changes are applied directly to the design without being saved.

Image source: Optimizely Drag the required content elements into your empty row and insert your content.
Compared to the template kit, content maintenance has become even more flexible. Title, paragraph, list, image and button can now be designed individually and combined freely. They are no longer part of a coherent text-image paragraph and therefore offer even more design freedom.
Basic settings for text elements can be made in the settings menu on the left-hand side. Individual styling using colors, bolding, etc., is also possible inline.
Images can be edited as usual after uploading. The new image database provides access to previously used graphics and offers the opportunity to manage your visuals in an order structure.
The elements "Separator" & "Spacing" help to structure the content. The "Menu", "Social" and "Icons" functions simplify the implementation of navigation bars, connectors and social media elements. If required, you can simply fall back on preconfigured default icons.
In the mailing structure, it is advisable to give each of your content an inner spacing - unless no spacing is explicitly desired. This ensures that your content "works" at every position without any further adjustment. As you can move any content to any position in the mailing, a uniform concept for spacing at content level is very valuable and saves time in the long term.
-
Mobile optimization made easy
In future, you will also save time when optimizing for the mobile version. It is now possible not only to hide content, but also to optimize the styling for the mobile version.

Image source: Optimizely The new "Mobile" flag in mobile editing indicates which settings can be set separately for the mobile version. In addition to font size and alignment (left-aligned, centered, right-aligned), this also includes the inner spacing. In this way, a significantly optimized experience for mobile users can be achieved without having to maintain content twice.

Image source: Optimizely Multiple columns within a row can be stacked or placed next to each other in the mobile version with a single click. You can also reverse the stacking order to place an image on the right above the text on the left in the desktop version. You can easily select and deselect these options in the row settings.
-
Target groups and personalization
Do you only want to show certain content to a selected target group? This is possible as before. In the properties of the respective series, navigate to "Dynamic content" and select one or more saved target groups.

Image source: Optimizely A small purple icon on the respective row tells you that this is content with a display condition. If the conditions of the target group apply to a user, this row is displayed to them.
Placeholders and field functions can be integrated into text elements via the "Personalizations" inline menu. A click opens the list of available options and enables a convenient selection.
The "Special link" menu item also offers the option of integrating the personalized link to the online version or unsubscribing with just a few clicks.
-
Save and reuse your own series
If you have created your mailing and would like to reuse certain sections in future emails, use the new "saved series" function.
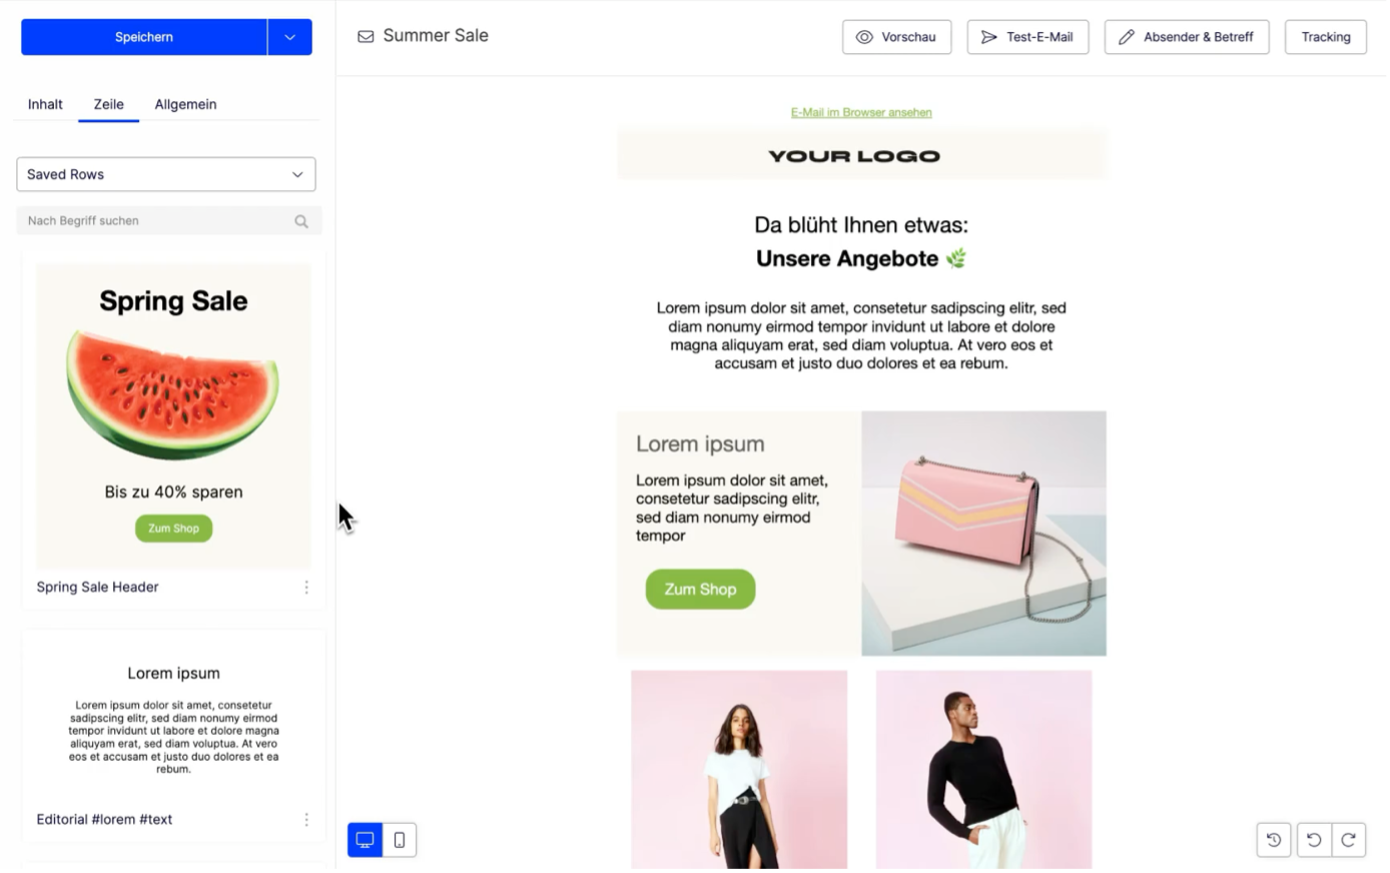
Image source: Optimizely Hold the mouse over the desired row and click on the floppy disk icon. Now assign a meaningful title to your series and save it.
You will now find your row in the dropdown of the "Layout" menu under "Saved rows". There you will see a preview of the available rows and can easily drag them to any position in your mail.
In this way, you can create your own "library" of reusable rows and significantly speed up the mailing creation process.
"Synchronized rows" are also planned for the future, which will allow you to push central changes to content and design to all connected mailings.
-
Undo changes

Image source: Optimizely Have you deleted or changed content but want to undo this? No problem. At the bottom right you will find the new "Undo/Redo" buttons as well as a session versioning of the last changes. Select the desired editing status or click on "Undo" to return to an earlier state of your draft.
-
Dark mode preview, test mails & save correctly
Once your mailing has been created, the test and approval process usually begins. We have added a dark mode preview to the familiar mailing preview. This simulates a possible dark mode display and allows you to recognize problematic mailing areas or graphics at an early stage.
In the top right-hand corner you will also find the familiar test e-mail function, which you can use to send your mailing to a test list or individual addresses.
Finally, save the mailing using the blue button at the top of the screen. Click on "Apply" or "Apply and close" to apply your changes to the campaign design. It is then necessary to save the campaign itself, as you are already used to doing with the template kit. Only then is your mailing content completely saved.
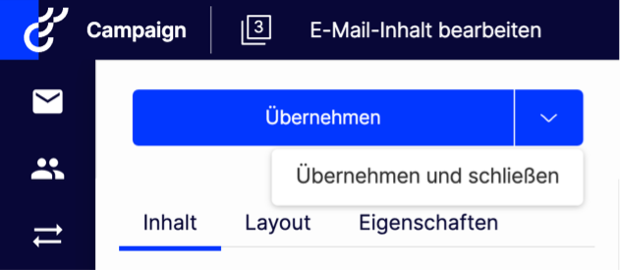
Image source: Optimizely If you have gone directly from the campaign overview to mailing editing, you can save the content immediately as before. In this case, the blue button is labeled "Save".
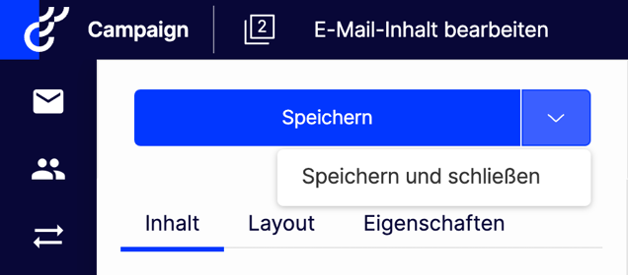
Image source: Optimizely
Our new email editor is currently in beta status. Some functions known from the template kit will only be available in the course of the year. Therefore, please check our changelog regularly. If you are still missing any of the features you love, you can also contact your CSM at any time.


- Last modified: 4/28/2025 2:50:55 PM